Part 2 /4: Age in Place – KITCHEN Cabinets
By Jan Addams (Designer, Author, Trainer)
Have you wondered why a Kitchen Renovation costs so much? Do you get confused when trying to select Kitchen Cabinets with all the styles, colours and quality?
If you have been following me, you know that my husband and I have ‘right-sized‘ our home and are attempting to make it an ‘Age in Place‘ home but with a ‘Resort Style‘ feel. After purchasing our ‘New to Us’ home and fixing several items that needed to be brought up to our needs, our attention turned to the room we both originally wanted to change – our KITCHEN.

It was time to put on my ‘design hat’ and begin the ‘compromise’ process once again. I often tell my clients that I am really just a marriage counsellor with a design sense! So began my own self-applied marriage/design counselling. My hubby and I had some very different views on what our new kitchen should look like. I should have brought in an outside mediator – oh wait – wasn’t that what all our friends and family were trying to be? It was amazing how many ‘great ideas’ were thrown around 😉
Wait a second... who’s the ‘expert’ here? I felt like a little girl with her hand up and being totally ignored. Nobody asked for my opinion. It was like I didn’t have a clue what I was doing; that 100’s of clients never paid me for my ideas, floor plans, colour and design options and that I had never done a renovation before! My ideas were being usurped at every turn. What was going on? I was beginning to feel inept! I reverted back to where I know my strength is – Visual Concept Design.
My hubby liked a Transitional looking, medium to dark stained wood kitchen with an open concept design where the kitchen, dining and living areas were wide open. He wanted a sink in his breakfast bar island with enough work and sitting space to hold court (he is the chief cook of the family).

This was fine but, this meant a full-on renovation that included removing the wall separating the dining room from the kitchen. No problem, except… we had a lot of plumbing, heating and electrical in that wall; in-floor radiant heating and to top it off the previous owners put all the existing cabinets in place including the island and then tiled the floor!! An absolute no, no!
We live in a ‘reverse’ plan, meaning that the living area is upstairs not on the main floor. I thought out, created, designed and printed off dozens of floorplans. I showed my concepts to hubby and friends both on my computer and in print form of the different options instead of trying to describe what I meant. Apparently, I speak in ‘pictures’ and people have a hard time understanding what I am talking about. The problem is that I always see the whole space in my mind up in full colour with all options chosen including its functionality or potential challenges. I don’t know where to start to describe what I see so it is like ‘the blind man and the elephant’ story, everyone was correct in their description of the part of the elephant they were touching they just couldn’t see the ‘whole elephant’ like I could.
So… the type of kitchen I prefer is a more contained space (like the photo below) which is what we currently had.

This is where I can close the door, feed my furry family and sit down to enjoy a cup of java on a delightful, cushioned nook bench that overlooked our outdoor living space and the beautiful morning sky beyond. Early morning is my quiet time to greet the day with gratitude, reflect and plan out tasks ahead. I always pictured sitting in a bright, distressed off-white French Country style kitchen with black accents, granite counters and brick backsplash that gave me a feeling of cosy, homey comfort. As you can see this was very different my husband’s idea of a perfect kitchen.
Here’s what I learned about kitchen design and cabinetry over the last 35 years:
DETAILS YOU NEED TO KNOW about KITCHEN CABINETS:
- Floor space width, length and height
- Windows & door sizes and their locations
- Appliances /plumbing fixtures must be found and purchased first for sizing and electrical requirements.
- Granite or Composite counters decided next for style and colour direction
- Flooring material, style and colour is next
- Lighting – both room and cabinet lighting – needs to be determined
- Cabinet material (wood, melamine, MDF); style and colour
COMMON SIZES:
- Kitchen base cabinets are 24”deep x 36” high with counter
- Distance between counter and uppers is 18 – 20”
- Standard Upper cabinets are either 15,21 or 24”H (above fridge) and should be at least 24” D
- Standard Upper cabinet widths start at 9” up to 39” wide in 3” increments and are 12”- 15” D
- Standard Base cabinets start at 9”, 12, 15, 18, 21, 24, 30, 36” to maximum of 48” wide
- Standard Drawer cabinets start at 12, 15, 18, 21, 24, 30, 36”
- Toe Kicks are 4” – 4 ½ high and 3” deep
- Table height is 30”high with 18”high chairs, stools or benches
- Counter height bars are 36”high and need 24” high stools
- Bar height counters are 42”high and need 30” high stools
COUNTERTOPS:
- Granite or composite counters are 2cm =¾” built to 1 ½” with plywood and 3cm = 1 1/4” thick
- Laminate counters = ¾” thick and come with the nosing built up to 1 ½” thick with plywood
- Countertop overhangs should never be less than ¾” and more typically is 1 – 1 ½”
- Islands that use granite should be built to the size of the granite and a portion raised or lowered if it is larger so that you don’t see the seam.
- The backsplash type, style and colour is used to tie in all other elements
ELECTRICAL:
- Electrical outlets are usually placed at 42” high (6 inches above counter on the wall, in base a base cabinet, or in a drawer – technology plugs)
- Light valances are attached only if there is a clearance of 18” between cabinet and counter to meet electrical code
- Ground fault outlets should be used everywhere in the kitchen
The KEYS I use to pick COLOURS:
- Wall and trim paint are the last elements chosen.
- If your cabinets are white or off-white, colour match your trim to them
- If cabinets are a paint grade colour, colour match your trim to your outlets/switches or if plumbing fixtures if white or off-white
- If trim is stained wood, the colour should coordinate with the cabinets and flooring
- Wall and accent paint should tie in the counter, backsplash and cabinets to create a harmonious space.
I thought that was a fair amount to know. Here’s what I learned – ‘the Devil’ is in ‘the Details’ when it comes to Kitchen Cabinets:
- All appliance specifications along with any adjusted electrical requirements. IE a counter depth fridge is 25”deep only if the outlet is recessed.
- Appliances need to be on separate circuits ie Fridge, Dishwasher, Microwave, Range and ovens.
- If a cabinet has glass doors the interior must be finished in the same material as the doors or a custom interior colour and the cost can double.
- Glass ready doors cost the same as regular doors unless they have wood or metal details.
- Finished sides are laminate, painted or stained wood and they are required wherever an edge is exposed ie: dishwasher panels, the base side of the sink cabinet next to dishwasher; sides of base cabinets next to a slide in range; wall panels next to refrigerators etc.
- The bottoms of uppers, if they are seen from an eating bar and don’t have a light valance, should be finished the same as the cabinet.
- The edges of fillers are also important depending if they protrude past cabinets ie: extended base sink front or upper microwave extended cabinet and over the fridge cabinets
- Upgrading to plywood cabinets can cost 15 -20% more than melamine.
- There are different grades of melamine and the commercial grade is much stronger and more stable than plywood which can warp over time.
- Toe kicks can be recessed or a furniture style kick is topically applied (extra cost)
Type of wood used in the cabinets increase the cost:
- Oak & Pine are typically standard
- Hickory, Rustic Alder and Maple 5 – 9% upcharge
- Cherry and Rustic Cherry 14% – 20% upcharge
- Red Birch 20%
- Black Walnut, Caramelized Bamboo, custom wood 60, 65 to 75% upcharge
- Style of door adds to the cost:
- Flat Panel – lowest cost
- Shaker style – standard
- Raised panel – medium (mitred corners are higher in cost but are less strong than mortise and tenon corners)
- Raised panel with applied moulding and/or beaded inset – highest}
- Specialty paint and finishes cost anywhere from 15 – 50% or more
- Chalked cabinets and glazed are the same – a brown, grey or black is placed in the edges to highlight
- Antiqued is a glaze that changes the colour add character
- Distressed cabinets have been glazed that can combine hand rubs on the corners, worn edges with added knife splits and dents.
- Style of cabinet
- Frameless
- Face frame ½” to 1 ¼” Overlay (traditional cabinetry that is the strongest built cabinets)
- Face frame Beaded
- Flush Inset with bead or applied mouldings (often seen in heritage homes and is the highest in cost)
- Appliance garages have many opening styles > hardware is a key factor
- Tambour door
- Two door
- Lift up hinges so door opens upwards
- Hideaway doors
- Lighting – room, task and ambient
- Recessed lighting, pendants, puck, linear, or strip lighting that is dimmable and can be used under upper cabinets but need designated circuits and/or electrical outlets to house the transformers
- Recessed lighting, pendants, puck, linear, or strip lighting that is dimmable and can be used under upper cabinets but need designated circuits and/or electrical outlets to house the transformers
- Hardware – costly but worth it!
- Full extension brackets under mounted on drawers don’t encroach on interior space
- Soft close on drawers is a hardware piece attached
- Soft close on doors is a piece added to the hinge (note: you can’t have soft close doors with touch latch as they won’t close properly)
- Decorative details really finish a kitchen design:
- Furniture baseboard and custom kicks
- Corbels
- Brackets to hold up counters
- Crown and light valance mouldings
- Cabinet edge trim work
- Island door panels or beadboard
- Hardware – knobs and handles
Hopefully, you found all this information useful. If you have any questions or comments – please comment below or on my Facebook Page: https://www.facebook.com/ImageToInteriorJanAddams/ Simply Me by Design,
If you are curious about how it all turned out click on the PHOTO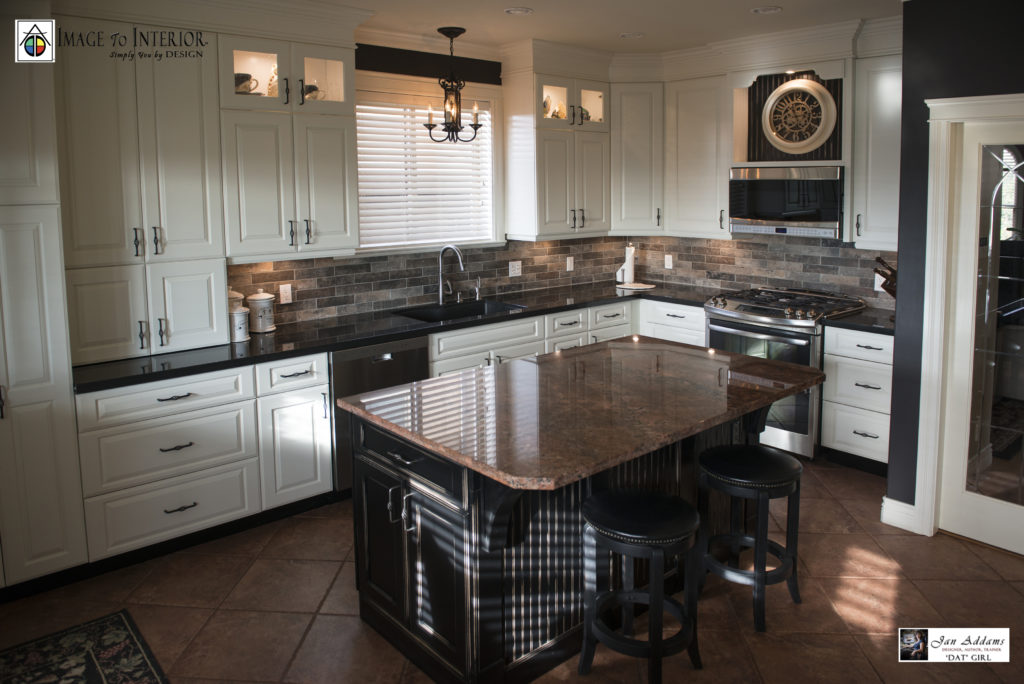
Jan Addams
(Designer, Author, Trainer)